Set up Gmail to access email from your hosting account

  1. Select settings from inside your Gmail accountgmail-step1
  2. Go to the Accounts and Import tabgmail-step2
  3. Click Add a POP3 mail account you owngmail-step3
  4. Enter your domain’s email address and click Next Step.gmail-step4
  5. Enter your POP3 information for your domains email address in the form. Click Add Account.

    The server does not accept PLAIN text passwords to be send without a secure SSL connection. Copy the settings from the image for POP server, Port and tick the Always use a secure connection

  6. If you do not want to send mail using this account through Gmail, click the No button.gmail-step7 You don’t  need to follow the next steps.
  7. Enter your Name.Click Next Step.
  8. On the Send mail through your SMTP server page, fill in your SMTP Server, Username (full email address), and Email Password. Then, click Add Account.
    The SMTP server is the same as the POP server: server2.evershosting.com
    Port: 465
  9. Now, Gmail will send a verification code to the address you just added. Check your domains email for a message Gmail sent you. You can use webmail for this.

    http://webmail.your_domain.com

    Click the link in the email, or Enter the code into the text box of the Gmail setup, and click Verify

    The End

    A little help setting up an account is right here: https://evershosting.com/blog/email-account-setup-demystified/

Improve your success on the Web

With trillions of websites it becomes more and more important to stand out in the vast crowd of blogs and websites on the internet.

What will give you the edge?

Unless you know a lot of people willing to visit your site and interact on a daily basis you will need new sources to broadcast your existence and attract new visitors. Search Engines will point new visitors to your home by indexing your website’s pages if you make it easy for the searchers to find you first!

Being a Hosting Service Provider I’m concerned about my clients’ success on the web. Take the next few minutes to learn how to layout your precious blog posts on your website, the proper way. Evers Hosting

clients get SEO optimizations by default.


SEO later, baby!

There are lots and lots of Search Engine Optimizations that are required from overworked webmasters. You, as a blogger/author just want to focus on your work and not be bothered by technicalities. SEO can be overwhelming with all its facets. We’ll be looking at one part of it today: SEO for a blog’s article! Take the first step to a professional website with these very easy tips and make sure your name will pop up prominently, and rank among the bigger fish who happen to be in the same field as you.


Step 1: Title of your article

The most effective titles are about 10-70 characters long, including spaces. Keep your titles concise and try to have it contain some of your best keywords. Each article should have its own exclusive title.


Step 2: Keywords vs Meta-Keywords

Keywords are words or phrases that pertain to your article’s content which help search engines to properly identify the topic.

Meta keywords are site wide about you and your general content. Meta keywords are not being used anymore by Bing and Yahoo and have no effect on how your pages are indexed. Google stopped using it for more than 3 years now.

If you’re using Joomla CMS, you might still want to use meta keywords. It only takes a minute of your time.

WordPress out-of-the-box has no option to put (meta) keywords without the use of a plugin. Installing a plugin is NOT possible on WordPress sites that are free hosted on wordpress.com!
WordPress.ORG runs differently and does have the option available.

If you have WordPress installed on a third-party hosting provider like Evers Hosting, you have the full functionality of everything WordPress has to offer  as well, naturally!

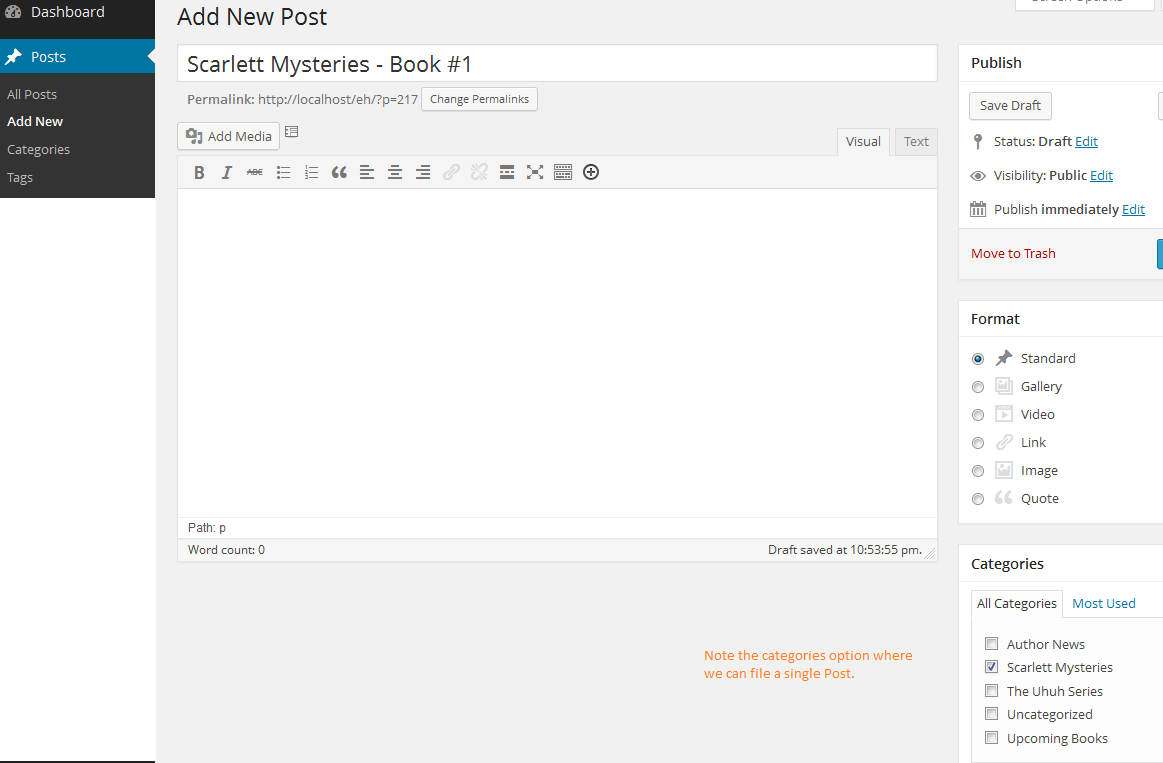
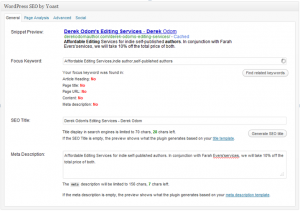
I’m using Yoast WordPress SEO for inserting keywords to my articles and it also has many other goodies that help you put your site on the map. The image below shows the options available to you when creating or editing a post.

seo-wordpress

Joomla has a section for (meta) keywords and meta-description built in so there would be no need for plugins.

Google Adwords Keyword Tool can help you find optimum keywords that present your content faithfully.


Step 3: meta-description

Meta descriptions are useful because they dictate how your pages are shown in the search results.

seo-meta

For optimum effectiveness, meta descriptions should be 70-160 characters long including spaces. Your meta descriptions should be concise and again contain your best keywords.


Step 4: Headingsseo-thumb

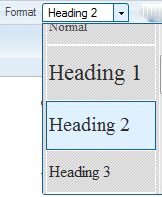
A.k.a. Header Tags are the second Most Important SEO factor. The header tags (H1, H2, H3 and so on) represent the beginning of a new section or chapter of an article, and they alert search engine spiders of the relevancy of the content that follows the heading tag. It’s best to only use H2 and H3 inside a post where H1 is reserved for the title. Your WordPress template should automatically create H1 Header Tags for the article’s titles. This is often not the case however, and a small fix of the .php of the template’s base files is needed.

H1 & H2 headers can be very effective in helping shape the search engines perception of your pages content. It’s always a good idea to have great headlines with H2 and H3 Tags. As we know Heading Tags typically make Text larger than normal text, indicating to your readers that this text is important.


Step 5: Images

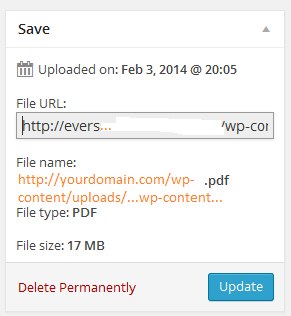
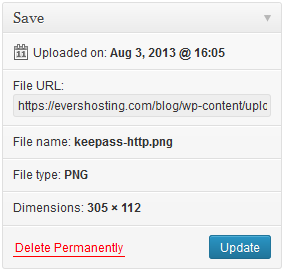
Images are nice and give flavor to the lengthy texts. Don’t put images in your article and then rescale them! Instead use a photo editor to crop the image to the correct size or use some automatic thumbnail creation (like WordPress has built-in)

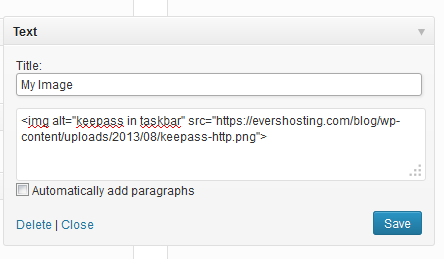
Don’t forget to give the image a title and Alternate Text or so-called alt-tag

One of the simplest ways to make your website more accessible is to use an alt attribute in your image tags. It’s amazing how many people forget to use this simple feature.

Tips for Writing Alt Tags

Be brief

It might seem nice to describe what is exactly in the image, that’s not the purpose of the alt tag. Instead, it should be filled with exactly the words needed to put the image in context and no more.

Examples:
a car – good
a black car – better
a 4-wheel driven black metallic car I owned in the seventies – too much

Don’t describe the image if it’s meant to be viewed in context. For example:
If you’ve got an image of the company logo, you should write “Company Name” and not “Company Name Logo”


Step 6: Text/HTML ratio

Your website’s ratio of text to HTML code should always be above 15% for good SEO gain, if it is below 15% then that means that your website probably needs more text content. Improve your SEO by adding more relevant text to your pages. This one is not easy when you’re a graphic designer! Most author’s blogs I’ve come across have this one nailed anyway…Good!


Step 7: Share

Link to other sites. Wherever you can and if appropriate, leave a link to your site or article. The more prestigious the site is the more weight search engines will give to YOU. Are you a member of a forum? Put a link in your signature. Don’t spam! Use the force wisely, don’t abuse the system!

Social sharing! What? You’re not on Twitter and Facebook and don’t know about Google Plus 1? Make sure others can share your post on the main social media! Really!

Give link love, Get link love.


Conclusion

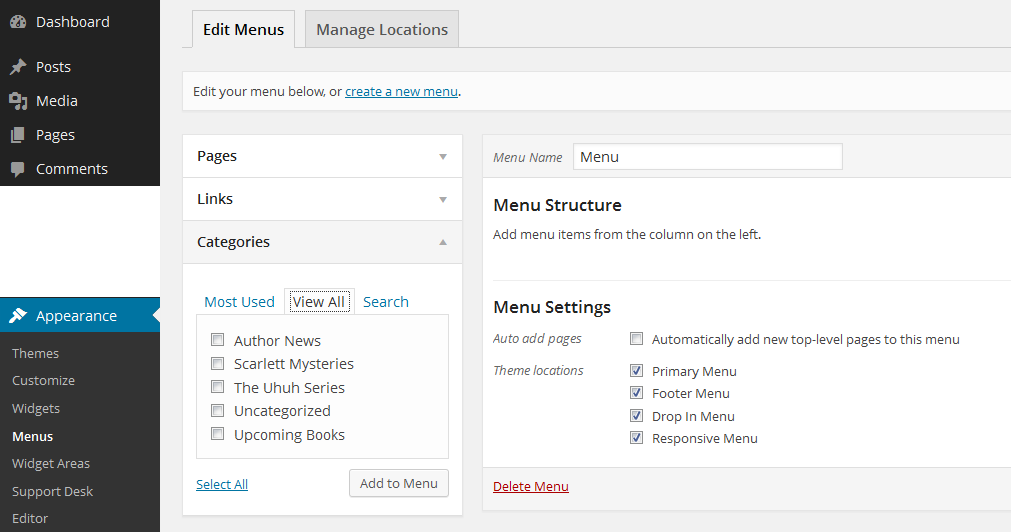
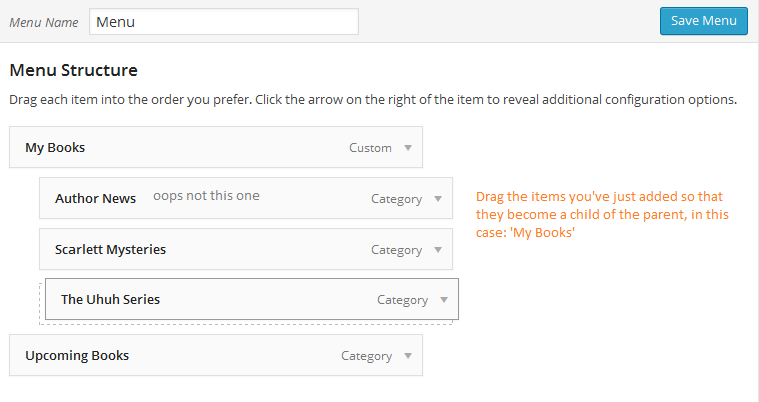
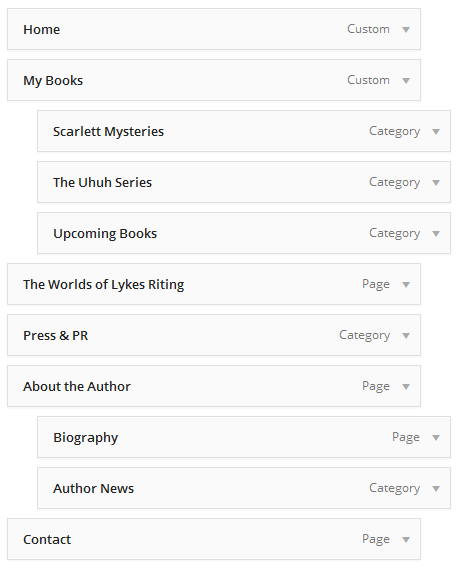
All your articles are put nicely in categories which are linked to menu-items where your visitors can easily find what you and your work are all about. Or is it? Are they all thrown on the front page where people have to scroll down to the cellar? Does it take ages to load your home-page? Remember visitors will wait for maybe 6-10 seconds before they run out of patience.

**Write unique content**

Blog at least 3x a week with unique fresh content

Share your post on Twitter, Facebook and Google+1

While you need to make sure that the site is accessible and understandable for the search engine crawlers, it is important to remember that the search engines are not your audience, the people are.

Without a doubt, content is the biggest contributor to search engine page ranking, so if you want to raise your rankings, make sure you have quality content.


Happy Blogging!


Check your site’s SEO | Aim for Grade B

farahevers.com Overall SEOSiteCheckup Grade: B (Good)

Check the speed of your site | A good score is 80 and higher

Farah Evers – Design Services got an overall Page Speed Score of 87

(out of 100).


Disclaimer:

This article ONLY speaks of optimizing an article. There are many more facets to SEO, but these tips make sure that the most work is done. Imagine if you have to change every single post on your site. The other SEO settings are mostly related to the core workings of your site, like:

– loading speed

– geographic tags

– canonicalization issues

– SEF Search Engine Friendly URL’s

– Usage of Flash, iFrames, Java, AJAX

– viral components like Rating system, comment system, review system, RSS feeds

– Sitemap, Analytics, Age of you website….the list goes on and on

WordPress: How to link to any file in the Media Library

Sometimes it’s not too obvious how to use a certain file residing in your WordPress Media Library. It’s pretty easy to do from the (posts- or pages-)editor but what if you want to link to a file, image or PDF for example, in a custom text widget or a custom menu item?

#1 Go to the Media Library and open, or edit the file in question.
Find the box in the image on your right hand side.
file-linkThe file URL should look something like:
http://yourdomain.com/blog/wp-content/uploads/2014/02/filename.ext

You *could* copy this URL fully and use it in any part of your website or any friend’s website for that matter.
A more robust usage would be to just use the part after your domain. This way, should you ever move your contents to another domain, the link will still work.

#2 Usage

Example: Adding to a custom menu item.
Title: Anything you want to name it.
Link: /blog/wp-content/uploads/20xx/xx/filename.ext

The link is the part right after the domain, including the slash(/). In the example given, WordPress was installed on a subdomain called ‘blog’.
In your case it might be: /wp-content/uploads/20xx/xx/filename.ext

Example: Adding to custom text widget.
Title: Anything you want to name it.

Link: <a href=”/blog/wp-content/uploads/2014/02/filename.ext”>TEXT TO CLICK</a>

#3 The End

We’ve been putting little tutorials, born from customer’s questions.
If you have something you’d like explained, don’t hesitate and maybe your head-scatcher will turn into a nice tutorial for all the gain from.
(There will be no mentioning of names and domains)

Happy Valentines!

Master the WordPress Menu

This is one of those things that confuzzles more people than we anticipated. So let’s shine some light on creating and managing a website’s navigation, or simply: a menu.

Create your own navigation, no GPS needed.

Many themes support WordPress’ built in menu manager, some offering multiple menus to be displayed at the top(header), bottom(footer) and maybe other spots on the site.

You should plan your menu structure ahead, so you have a clear idea of where to put future Posts, Pages and Categories for said Posts. A well thought out navigation will of course greatly benefit your visitors as well.

Let’s invent a test case with multiple nested items of all the types mentioned above.

Fake-life test case.

We are geared toward helping authors as this is how we started our services. So in our hypothetical case we’ll use a fictional author (Lykes Riting) on his fictional website (lykesritingauthor.com)

The planning resulted in something like this:

– My Books

– The Worlds of Lykes Riting

– About the Author

– Press & PR

– Contact

Breakdown of the test case.

Which items are static content, just one page?
Which items are categories, containing multiple posts?

For me: About(biography) and a Contact menu-items immediately ring the static-one-page bell. So these would be created in the Pages section.

page‘The Worlds of Lykes Riting’ is also going to be a static, single page. No need for adding new information on this subject every time. (Still my opinion)

Author News has to be a Category as it implies regular updates.

categoryThe same goes for ‘Press &  PR’.

The books can be either. Where it says ‘series’ you have the option of creating a single Post for each book, or you might prefer to have them all on one single Page.
I prefer the Post per book as it allows to have a Comments section just for that one episode, and maybe it ignites discussions.
Pages can have comments as well, but if you would slap all books on one page, the commenter would have to specify which book and so on and so forth.

postI’m going to show you a nifty trick for the ‘My Books’ item.
I believe making this a category or page that also contains all the books is useless.
Instead we’ll make it a menu item without content. Just as a placeholder for it’s children: The actual books.

The creation of the actual menu.

Go to Appearance>>Menus to manage your own custom menu(s).

menu-createNow let’s build this thing.

First create a Custom Link for ‘My Books’ like in the image:link…and add to Menu.
If you haven’t done so, create a menu first, any name will do.
Next: add the items and place them in the section you want. Here, I’m putting the ‘book series’ under the ‘My Books’ section. (note: one item got tangled along and needs to be deleted first)

dragThe same goes for Pages. Drag&Drop+Save.
The whole menu will look something like this, still in the admin of WP.menu

And here’s the result on the public end:result-menuThe custom links Home, My Books and About the Author serve as a placeholder but don’t contain actual content. ‘Home’ is your homepage displaying either your recent Posts or a static Page. You know, the usual WordPress stuff…

We hope this little guide will come in handy. If you need assistance you know where to find us.

The ins & outs of Taxes

This applies to all clients, individual or company.
note: Evers Hosting is based in the Netherlands and is under the EU law.

Companies/Individuals outside EU:

Electronic services (e.g.: web hosting, domain, design,…) for anyone outside the EU are exempt from taxation.


Companies inside the EU

Electronic services to EU companies are exempt from taxation only if the VAT Identification Number of the client(company) is stated on the Evers Hosting invoice.
If applicable, please update your company details here (login required): https://evershosting.com/client/clientarea.php?action=details


Individuals inside the EU:

Our services are taxed with the Dutch VAT (21%) for all individuals inside the EU.
Unlike 99.99% of other web hosters, our prices include taxes, so no surprises when you checkout.


By default our invoices state the amount of taxes. Anyone outside the EU can disregard this safely.

Should you have any questions, please contact us through our form.


eMail account setup demystified

Most of the following information is generally applicable, not just for our clients

First Steps

You have just bought a hosting account with your own domain name (yourdomain.com).

In order to setup all the services that come with your account (mail, ftp, database, logs etc), your providers will give you administrator access to a management system of their choice


Since we’re using cPanel,this is what I will use in the following examples. But it also applies to DirectAdmin, Plesk or anything you happen to be presented with by your hosting company.

cPanel is the industry leading control panel that provides access to all your hosting account’s settings in a nice graphical manner.

eMail account setup

Access your Evers Hosting backend by using the following URL: yourdomain.com:2083

(Other providers might use 2082 as the cPanel port. DirectAdmin uses 2222. Check the e-mail you received from your provider when you signed up.)

Locate the ‘Mail’ settings and choose ‘e-Mail Accounts’.

cpanel mailFill out the fields in the next screen…

create mailIt’s important to use a strong password. Please refer to this article so you know how to create a good one that’s also easy to remember.

Are all the check-boxes green, and the password strength 100/100? Good, let’s continue to how to access this new e-mail account from your computer, phone and tablet…

POP or IMAP

The Settings

mail settingsSecure versus non-Secure

If you have your own SSL certificate, which can be obtained from Evers Hosting ($25/yr) you can use your own yourdomain.com as both the incoming- and outgoing server. The ports are the same, 993 for IMAP – 465 for SMTP.

You can freely use our SSL to secure your mail traffic with the above settings. Please adjust the server setting to the one your are hosted on.

At the time of writing there are 4 Evers Hosting servers. All named server1-, server2-, server3- and server4.evershosting.com.

IMAP versus POP3

POP3 only makes sense to me if you’re using a single location where you receive and send your e-mails from.

WebMail Access

The final option is to use your browser to access your mails from all over the world.

You can do so using the following URL: yourdomain.com:2096

Again, these ports might vary for different hosting providers. Please contact them if you are unsure.

ALWAYS CLEAR BROWSER HISTORY AND COOKIES AFTER YOU USED A PUBLIC COMPUTER.

Keep your mail to yourself.


Thanks for reading. If you have any questions, please feel free to contact us.

Time to read some e-mail,

Cheers!

Create a custom text widget in WordPress

One of the most commonly used widgets is the ‘text widget’. We’ve found many authors using this text-widgetnifty widget to create a ‘buy now’, ‘recently read book’ or any other nice piece of information.

This widget supports html as well as plain text and what we see a lot is usually some copy/paste from a website. This gives mixed results as the html from one site might (mostly not) work for yours.

Let’s check out some examples you can use in your site without breaking anything…and make it look good.

# Display an Image

copy-image-urlFirst download or create the image you want to display in your widget and upload it in your WordPress Media Library. After uploading, go to the library, find the freshly uploaded image and click ‘edit’. Copy the image link from the box on the right.

<img
alt=”short description” src=“the link you just copied”
>

In the above little code example you can see what the HTML looks like.

Now here’s a working example written in one line taken from the example:

<img alt=”keepass in taskbar” src=”https://evershosting.com/blog/wp-content/uploads/2013/08/keepass-http.png”>my-image-widgetAll done, you’ve just created a custom image widget with clean HTML code.


# Image with click-able link

Let’s add a link to this image so you can direct visitors to go buy, vote or check out anything you want to.

<a href="the link for people to click"><img scr="link to your image"></a>

Updated example from my image. The new additions are in bold style.

<a href="http://voteformehere.com-or-some"><img alt="keepass in taskbar" src="https://evershosting.com/blog/wp-content/uploads/2013/08/keepass-http.png"></a>


# Multiple images with text, links and neatly aligned

Let’s jump into a bit more complicated stuff.

Here’s the mark-up to display multiple images with text in a list form. Mix and match the various style options/values to place your images and text the way you want it.

<ul>
 <li>
<a href="link to click" title="image title"
 style="float:right; padding:20px 5px;"
 >text next to image</a>
 <img alt="optional description" src="image link" width="150px" height="150px;">
</li>
 <li>
<a href="link to click" title="image title"
 style="float:right; padding:20px 5px;"
 >text next to image</a>
 <img alt="optional description" src="image link" width="150px" height="150px;">
</li>
 <li>
<a href="link to click" title="image title"
 style="float:right; padding:20px 5px;"
 >text next to image</a>
 <img alt="optional description" src="image link" width="150px" height="150px;">
</li>
 </ul>

What’s going on here. First there’s a <ul> tag to start an unordered list. Followed by <li>, list items. You can add as many as you need here. The anchor <a> tag with the link and the <img> we’ve seen before. A new element style is added to make sure the images and the text are aligned.

You might want to play with the width, height and padding to get the results you’re after.

Use the ‘style’ tag

style=”option:value separated by a ;” – You can add the style tag to any element, not just an anchor <a> or image <img>

<a href="" style="float:right; margin-left:10px; text-align:center; padding: 5px 1px 3px 30px;">
<img scr="" style="float:right; margin-left:10px; text-align:center; padding: 5px 1px 3px 30px;" width="100px" height="100px">

Create your own widget based on these examples and have a few plugins less 🙂

Need help? e-mail us here.

Passwords, The Safe Way

I remember a documentary about ancient villagers who never locked their houses. They were simply not afraid anyone would do anything of a criminal nature.schuifslot

Are you locking your house when you leave? Stupid question?
Which lock resembles yours the most? Is it little better than a sticky piece of gum or do you have something robust and manly?

betterlockThe passwords you’re using on the web can be weighed in the same respect. Easy to guess or crack versus hard. Hard meaning; It takes a long time to crunch. It’s never impossible!


What’s a good password?

A weak password would be, one word related to your personal life, for instance. A first name, company name, etc. I actually recently secured a Dutch based, company’s website after it had been hacked for the gazillionth time. It turned out they had a customer form, connected to a database, using the name of the company as the MySQL password! Holy catastrophe, Batman!

If you have a WordPress login that looks similar to: admin | yourname you’re asking to get hacked

A good, strong password would look something like:

w0rdunrel@tedword!

Two unrelated words stuck together with a sauce of character scrambling. E becomes 3, A becomes @ and so on.
Although easy to remember it’s still a hassle to type e v e r y single time. This is where a good and most of all secure password manager comes in.


How to manage your passwords

Creating a good password is easy (and kinda fun) but let’s talk about how to take them with you, enabling you to open all your websites and programs wherever you go. And in case you lose your, say phone, or the laptop gets stolen, your passwords would still be safe.

The safe way, now EASY.

The goal (for me at least) is to have all my passwords on all my devices (PC, laptop, tablet, phone, wristwatch, shoe) readily available in all browsers and programs. Here’s how I do it…


KeePass Password Safe

Benefits in comparison to other managers (LastPass and Dashlane notably)

keepass dbkeepass urlkeepass http


Protect Your WordPress

Following up on the humongous attack on all WordPress sites worldwide, early April this year…

Honey, we’re ba-hack!

We are very keen on having a safe environment for all our customers and last but certainly not least, we love having clean servers that do not execute programs written by hackers.

Early this year we added a two-step authentication for all WordPress installations. We took it off after the attacks seemed to have stopped. Untill now! We want to take a different approach this time, because not all of you appreciated the hassle of having to input two sets of user credentials.

This approach is easy to implement but needs your action! Add the code below to your .htaccess in the root of your domain.

Find out what your IP is here: http://www.whatismyip.com/ or visit https://evershosting.com/client/cart Your IP is at the bottom of the page. If you need to add more than one workspace (IP), add more Allows like shown in the code

<Files .htaccess>
Order Allow,Deny
Deny from all
</Files>

<Files wp-login.php>
Order Deny,Allow
Deny from all
Allow from 1.2.3.5
Allow from 1.2.3.4
</Files>

1.2.3.4 #change to your own IP

If you know how to edit files via FTP you edit a file called .htaccess manually. It resides in public_html

Be sure to use a plain text editor like NotePad or something more ‘pro’ like NotePad++ or Sublime Text

Using a plugin to do the dirty work

WP htaccess Control

(version 3.3 at the time of writing this post)

Find it and installinstall plugin

Open the plugin settings page

htaccess controlAdd the code to the Custom htaccess using your own IP.

#start of custom code

<Files .htaccess>
Order Allow,Deny
Deny from all
</Files>

<Files wp-login.php>
Order Deny,Allow
Deny from all
Allow from 1.2.3.4
</Files>

#end of custom codehtaccess control settingsSave!

It’s confirmed working on the latest WordPress 3.6

We can do this for you, once requested

Addition for websites with multiple (admin) users

If you have a webshop or a multi-blogger environment, the above method won’t do.
Instead use the following code for your .htaccess

#begin custom code

<Files .htaccess>
Order Allow,Deny
Deny from all
</Files>

<IfModule mod_rewrite.c>
RewriteEngine On
RewriteCond %{REQUEST_URI} .wp-login\.php*
RewriteCond %{HTTP_REFERER} !.*yourdomain.com.* [OR]
RewriteCond %{HTTP_USER_AGENT} ^$
RewriteRule (.*) http://www.google.com [R=301,L]
</IfModule>

#end custom code

Any attempt to directly login to your WordPress administration area will result in a redirect to Google. In order to login as a legitimate user you have to create a link on your homepage (e.g. in your footer). You can use a widget for this.

Here’s some example html to be used in a custom text widget:

<a href=”http://yourdomain.com/wp-login.php”>
<img style=’float:left;margin-right:10px;’ alt=”icon” src=”https://evershosting.com/img/icons/icon-user.png”>Login
</a>

Without the icon:

<a href=”http://yourdomain.com/wp-login.php”>Login
</a>

UPDATE: Protection is now automatic for Evers Hosting clients!


How to use FTP

Following up on a client’s question, we decided to post an article on the best way to use FTP.

When, Why, and How to use FTP?

Your website resides on a server’s hard-disk, but unlike your computer’s hard-disk, most users never touch or see the files directly. All CMS’s provide necessary functions to upload images, write posts, and what not.

FTP provides a direct way to access your hosting account on the server’s hard disk much like Windows Explorer. This makes it very easy to transfer large amounts of data, like multiple images. You can also upload lots of single files, like a new template for a CMS like WordPress. That would be pretty undo-able using a form’s upload field.

A common use for me is to replace a previously uploaded image that needed changing. Uploading via your CMS would cause the newly uploaded file to have a new name (e.g. image(1).jpg) causing wasted space. A quick FTP upload replaces the file and, the post containing the image is auto-magically updated as well.

Personally we’re using FTP (File Transfer Protocol) on a daily basis, quickly updating or altering certain files like .css in order to change a theme’s layout, or even downloading backups generated by the system, for instance.

Suggested software for using FTP

I would strongly discourage using FileZilla as it stores passwords unencrypted in plain text on your computer. There are viruses active as we speak (trojans) that look for these specific files in order to gain access to your hosting account, after which they inject malware and have your account working for them!

We suggest WinSCP using a secure encrypted connection to prevent eavesdropping on your transfers. See below on how such a connection is setup in WinSCP.

WinSCP

If you are a EH client you can either use the server’s IP or your domain name in the ‘hostname’ field.

Check your signup e-mail for details.

Example for the Author Packages:
IP: 109.201.146.24
Domain: ftp.yourdomain.com

The best way is to create a new ftp account in your cPanel and lock this account in your ‘home’ directory, public_html.

That’s all folks,

Hope you found something useful in here today. If you need assistance, you know where to find us!

Cheers and enjoy your icecream:)